A maker’s mark, or a pottery stamp, is a ceramic artist’s signature. This could be an actual signature made by directly inscribing it into the bottom of a freshly trimmed piece, or by stamping a logo into the clay.
I prefer the latter, simply because it makes my pieces look more uniform and professional, and also because I am lazy. And thanks to that laziness, I will show you how to create your own 3D printed maker’s mark, the easy and lazy way :)
And the best part? It will be (mostly) free*! (* if you have access to a 3D printer)
For this tutorial, you will need:
- A drawing tablet (preferably), or a pen + paper + camera
- A laptop
- Access to a 3D printer or 3D printing services
1. Draw your design
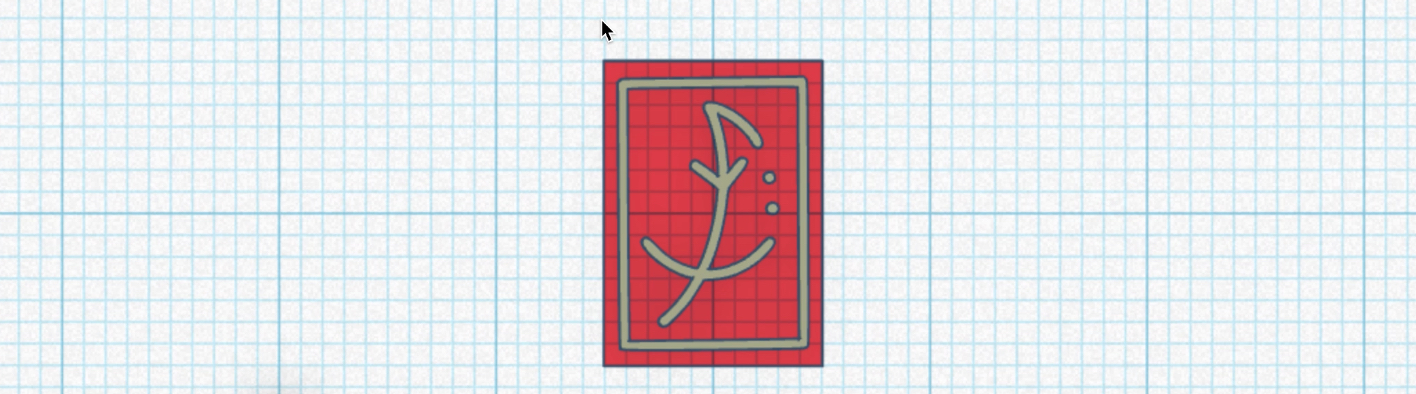
First, you need to have a design in mind and draw it in black and white. I used Procreate on the iPad and my design looks like this:
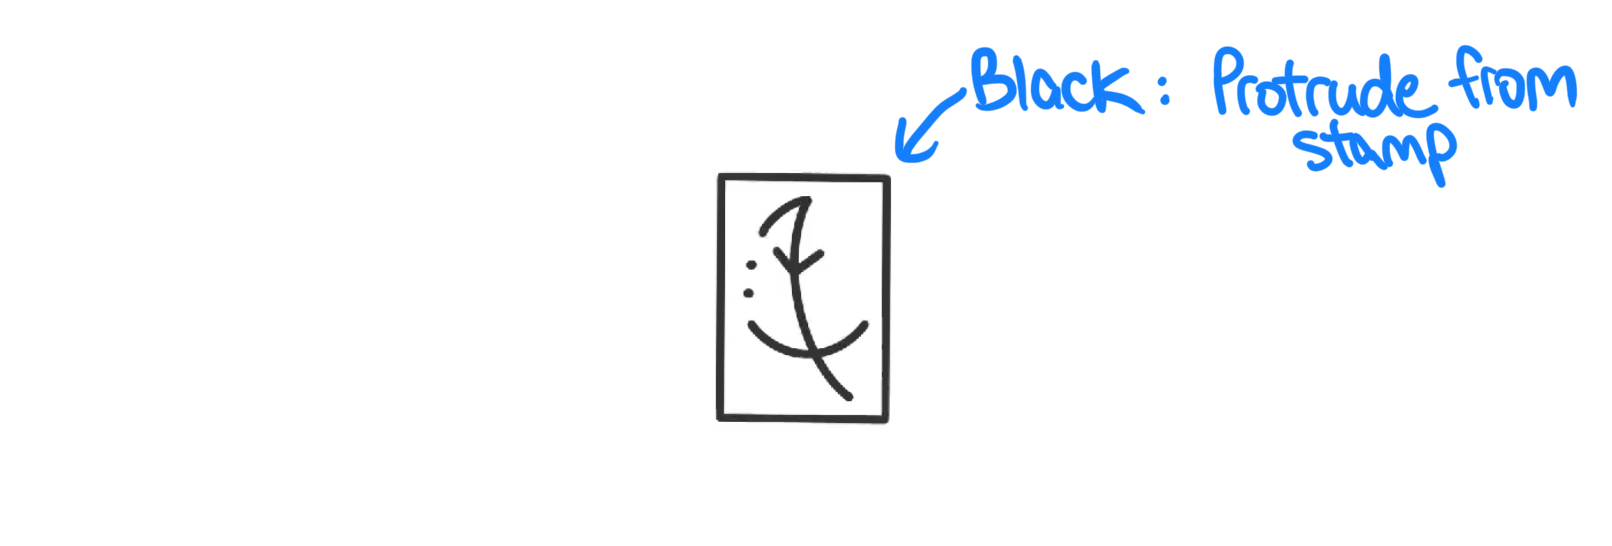 Make sure that the parts that you want protruding from the stamp (aka digging into the clay) are in black.
Alternatively, you can also draw on a piece of paper and take a picture of it. Just make sure that there is enough contrast between the protruding parts and the blank space.
2. Convert to SVG
There are many ways of doing this step. The method I showed in the original Instagram video uses a free program called Inkscape.
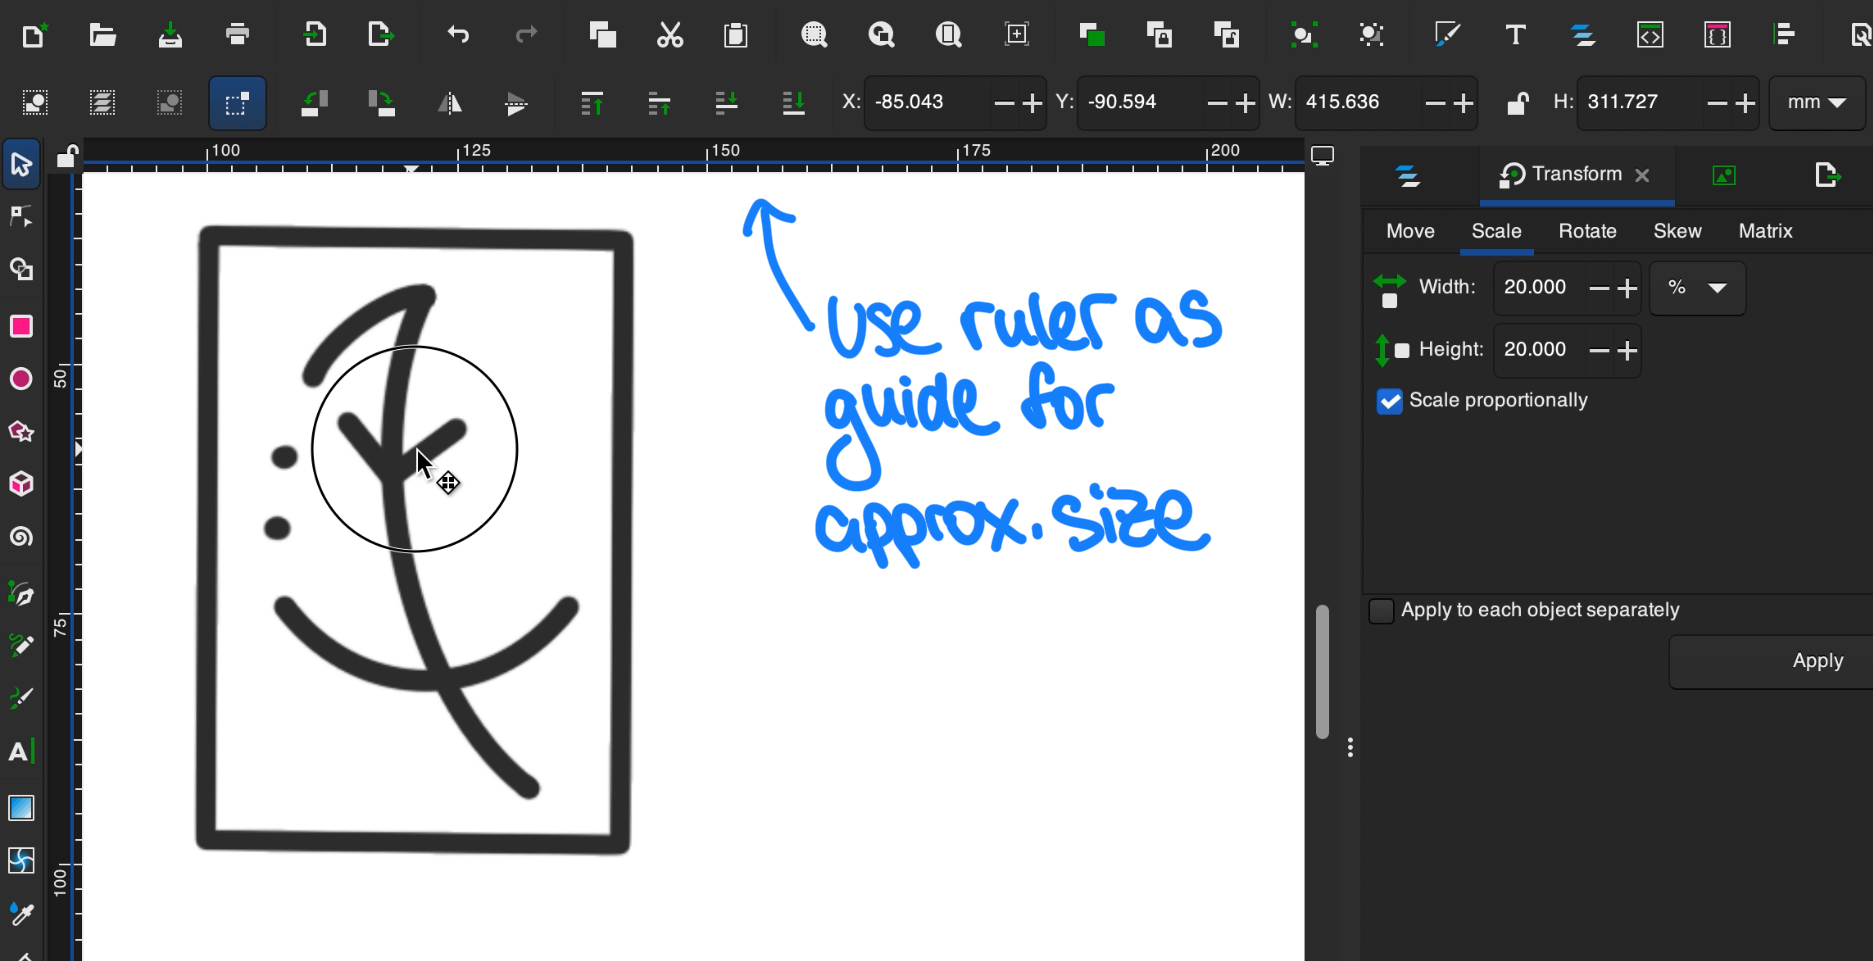
In Inkscape, after importing your image, you can resize it using the Transform tool and using the built-in rulers at the top and left of the window to approximate the size of your stamp:
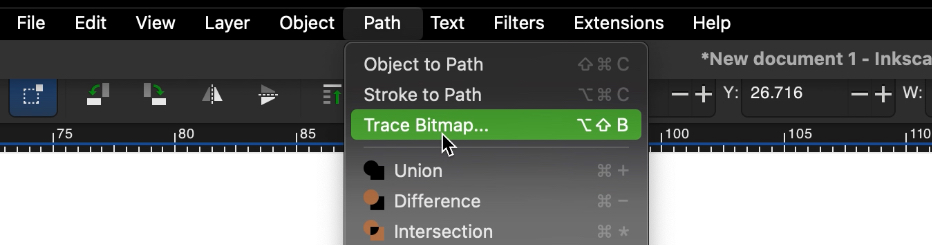
Once you’re happy with the size, click on Path -> Trace Bitmap. This will convert your design into vector paths.
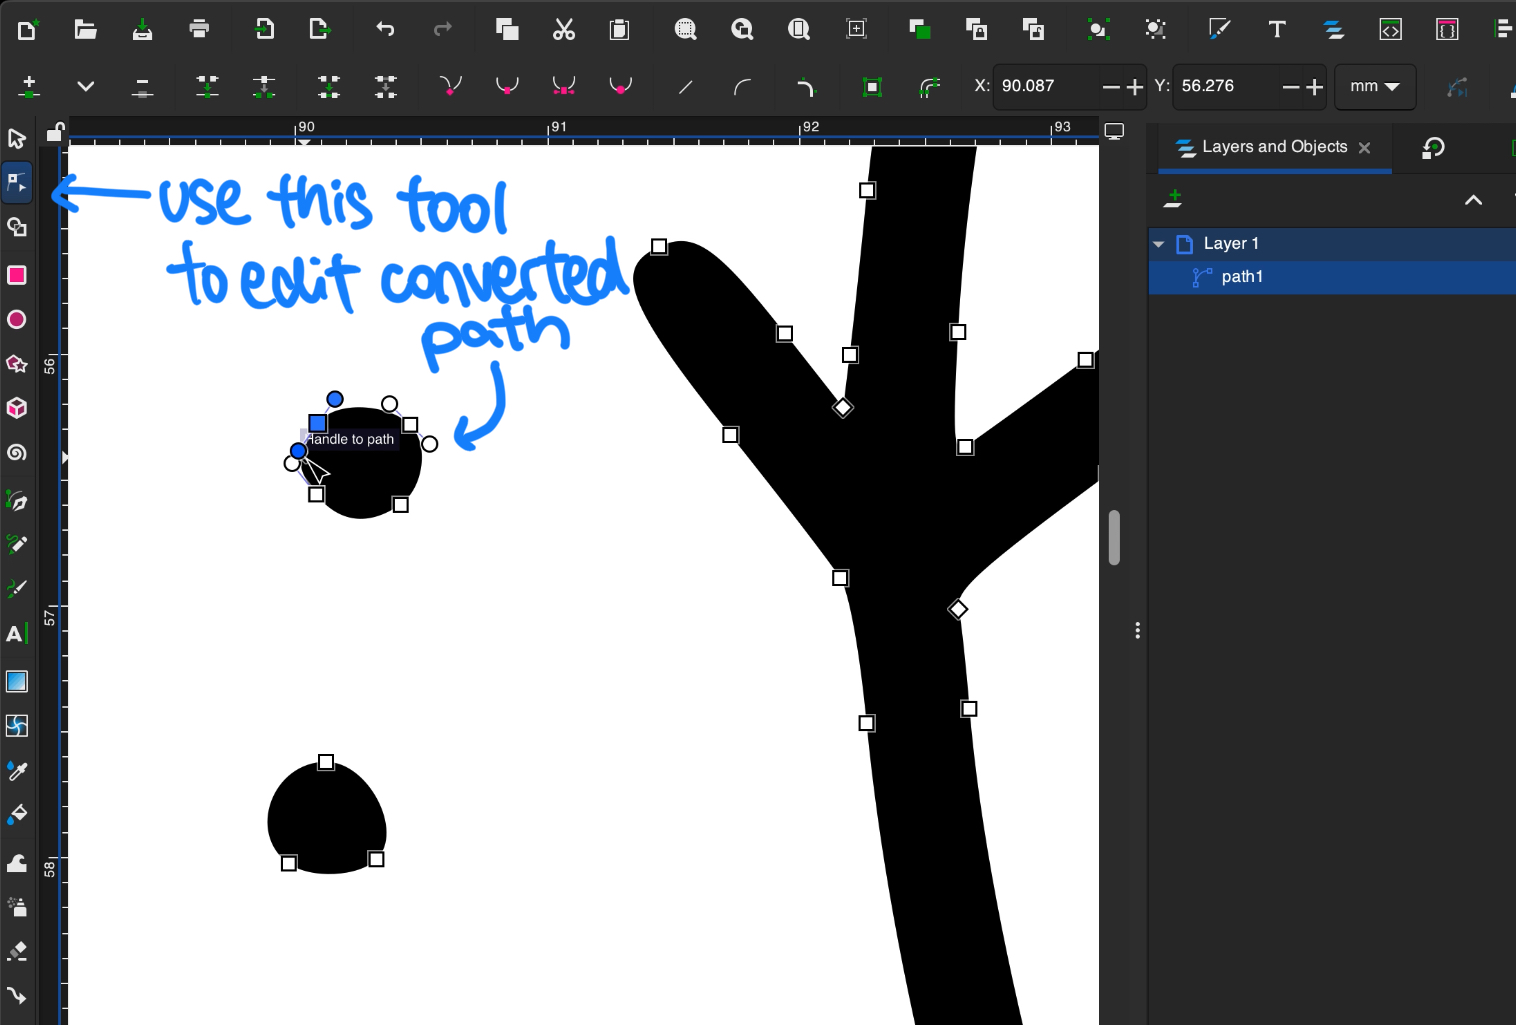
The good thing about using a vector graphics editor tool like Inkscape (or Adobe Illustrator) is that you have more power over fine tuning the vector path. I did not show this in the video for the sake of time, but I did spend a bit of time after the automatic conversion to make sure that my design is exactly the way I want. Although, with the (lack of) precision of a 3D printer nozzle, this step may not be super necessary unless the bitmap tracing goes wrong somehow.
Now, you can safely delete the original imported image and export the vector as a SVG file.
Alternatives
If you prefer drawing directly in vector form, you can do that in Inkscape or your editor of choice and skip to the next step.
On the other side of the spectrum, if you don’t want to download another software, there are plenty of online SVG conversion tools to use. Just note that these will not give you finetuning capabilities.
3. 3D modeling in CAD tools
My personal preference for CAD tools is actually Solidworks (I know, I know…). However, since I am no longer a student and do not want to pay for it, I had to resort to alternatives.
Luckily, making a simple stamp does not require complicated tools, so we can use a free online alternative called Tinkercad. Once you’ve created an account and opened up a new project, import your SVG file:
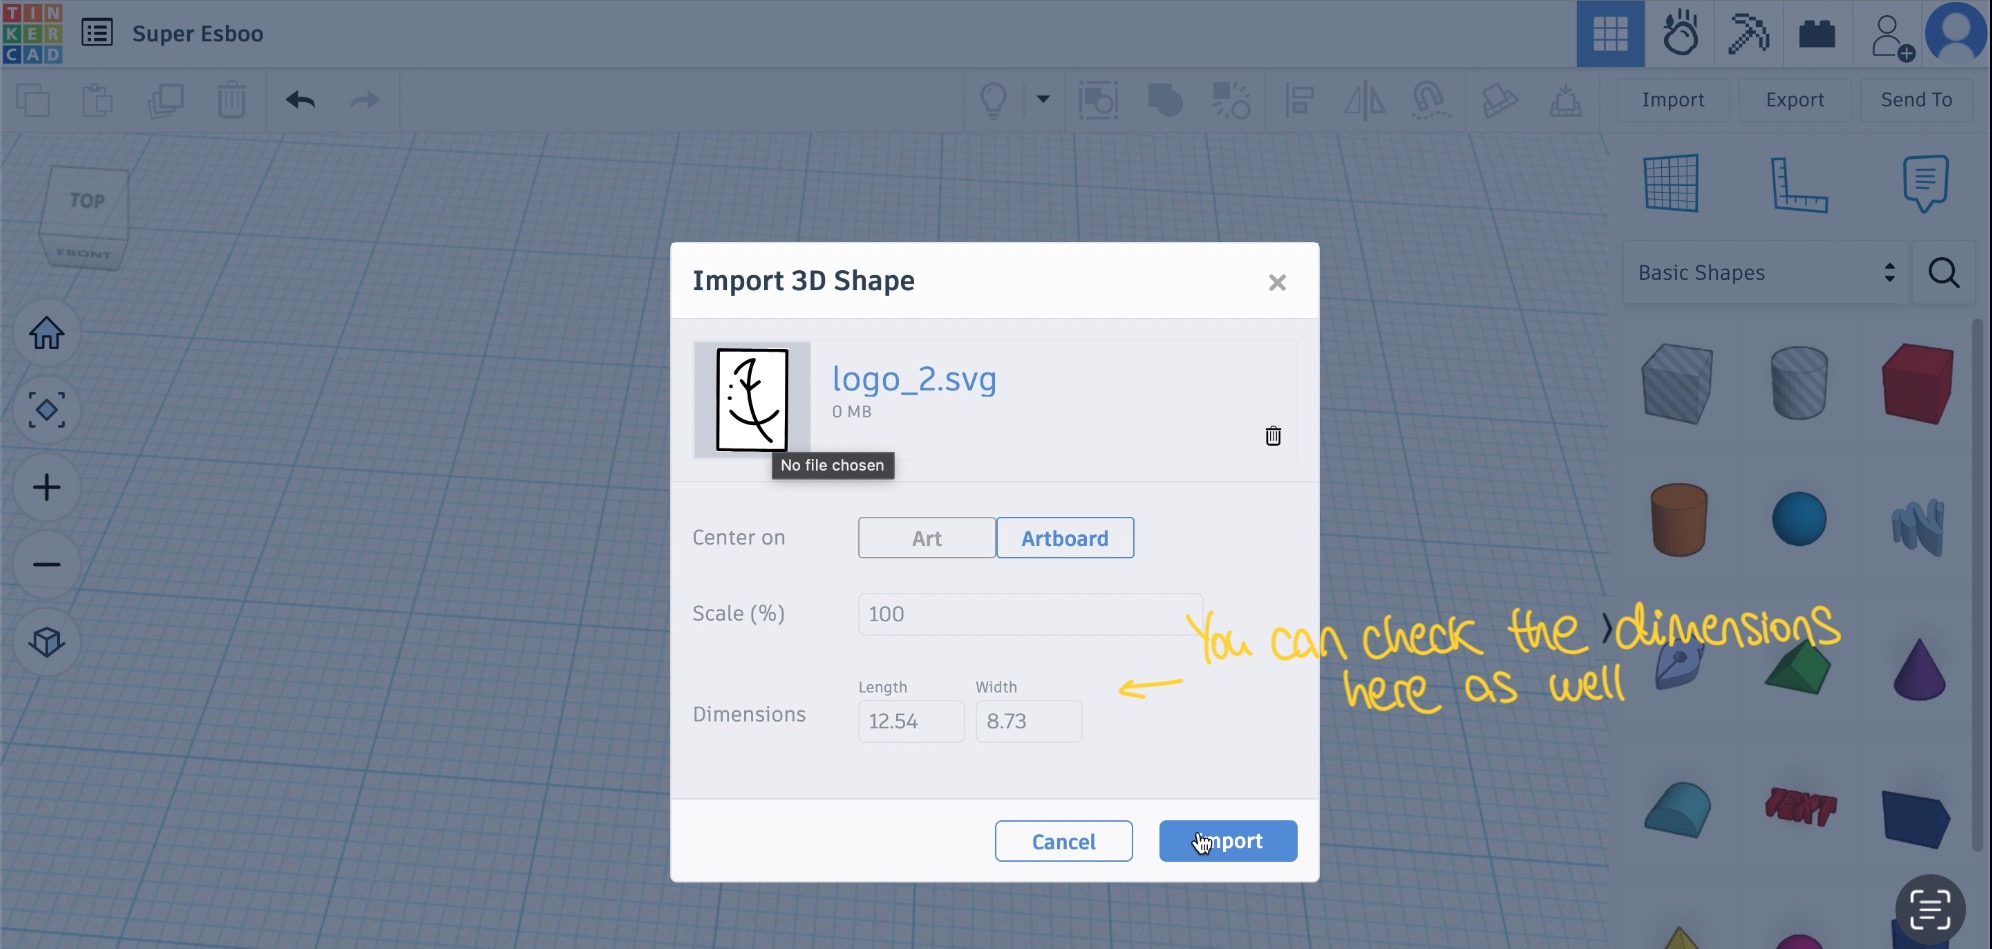 If you haven’t adjusted the dimensions of your SVG before this step, you can do it here in the import window.
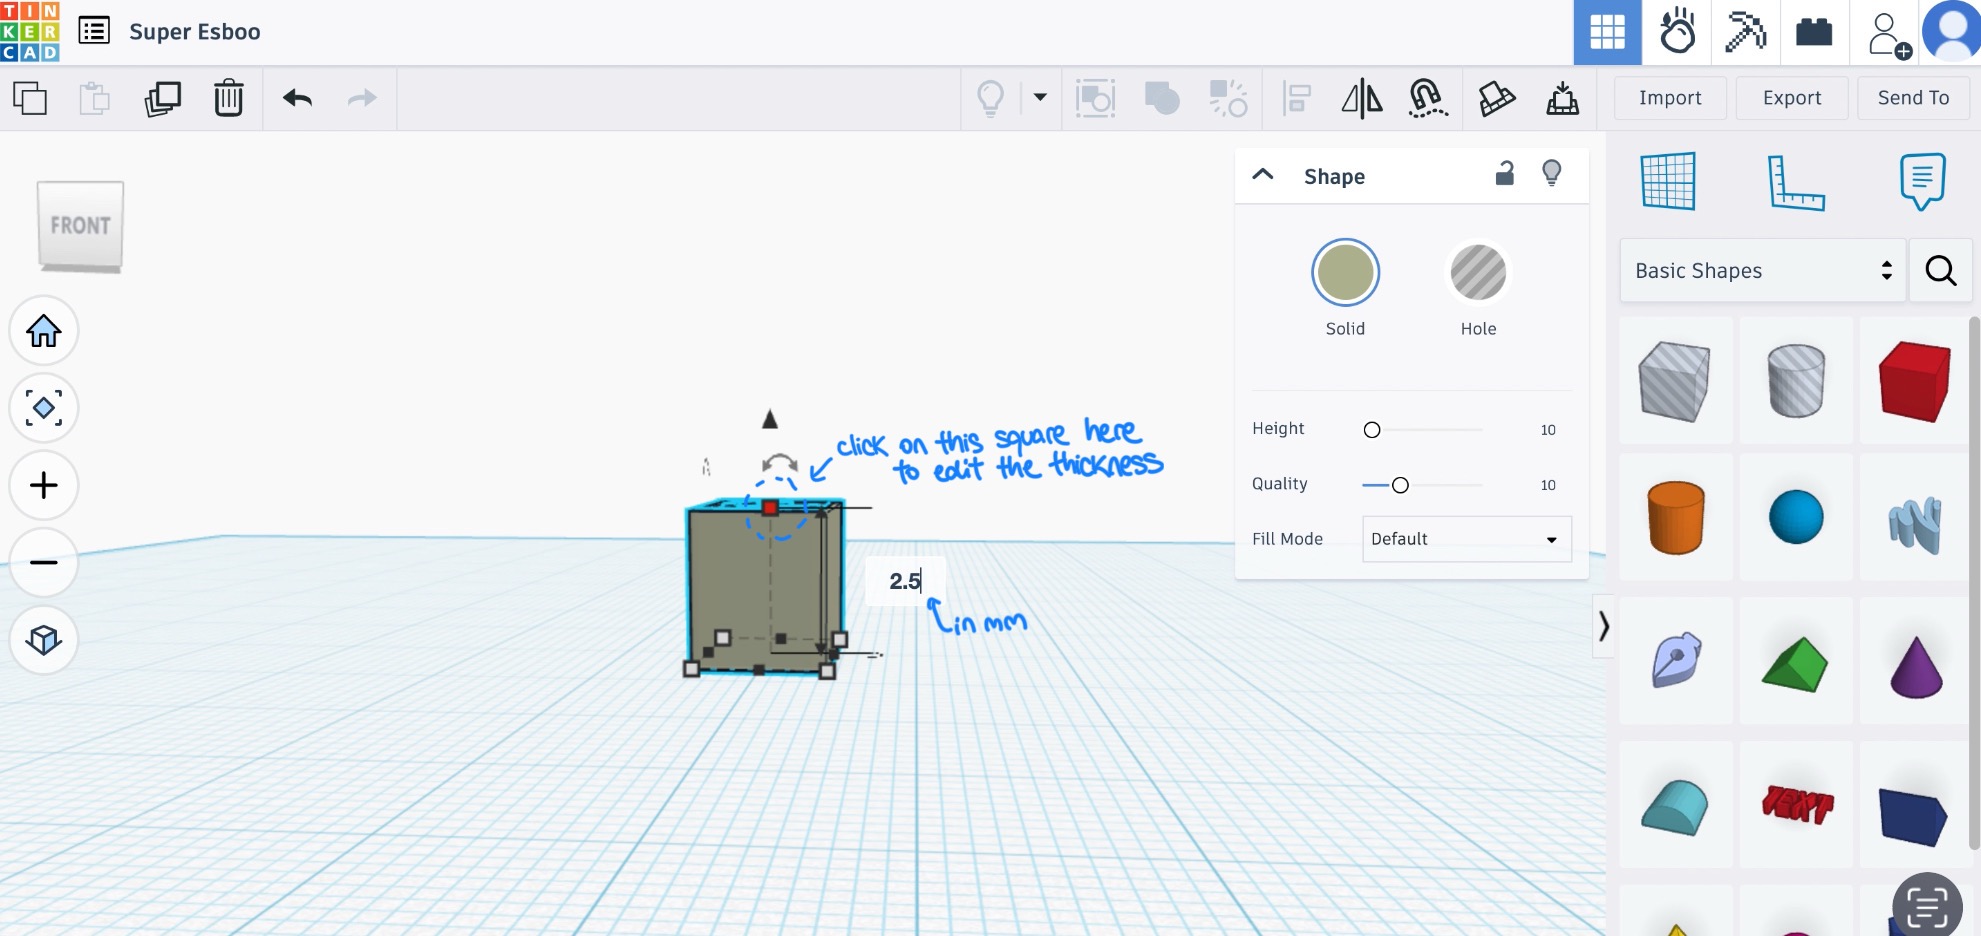
Once imported, Tinkercad will generate a 3D version of your 2D SVG by extruding it along the z-axis. By default, this will be too large for a stamp, so make sure to adjust its thickness to something more sensible (like 2.5 mm).
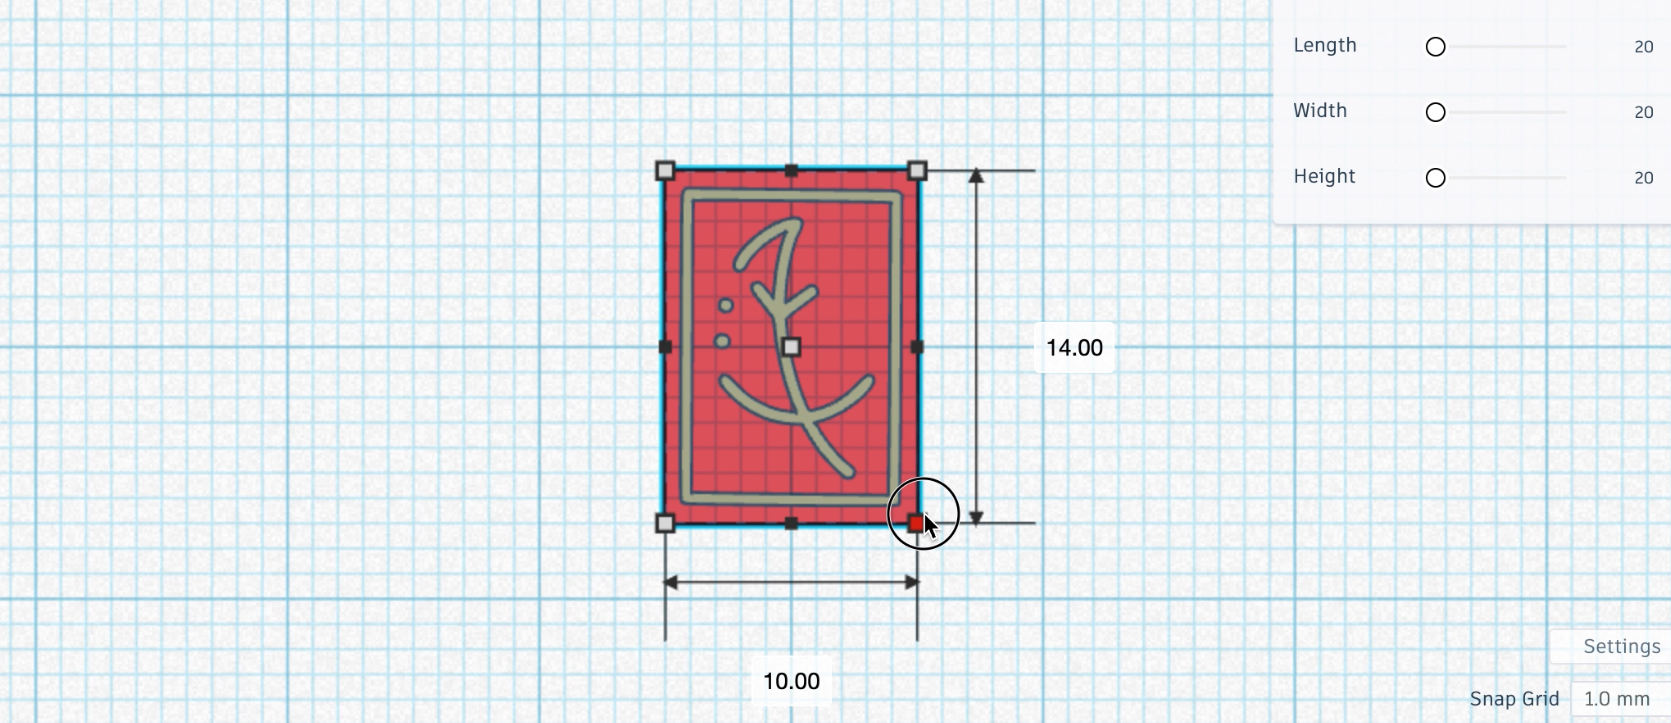
Time to add a base for your stamping bits to attach to. I am adding a rectangular base to match my rectangular logo, but the shape really doesn’t matter much as long as it covers all of the logo.
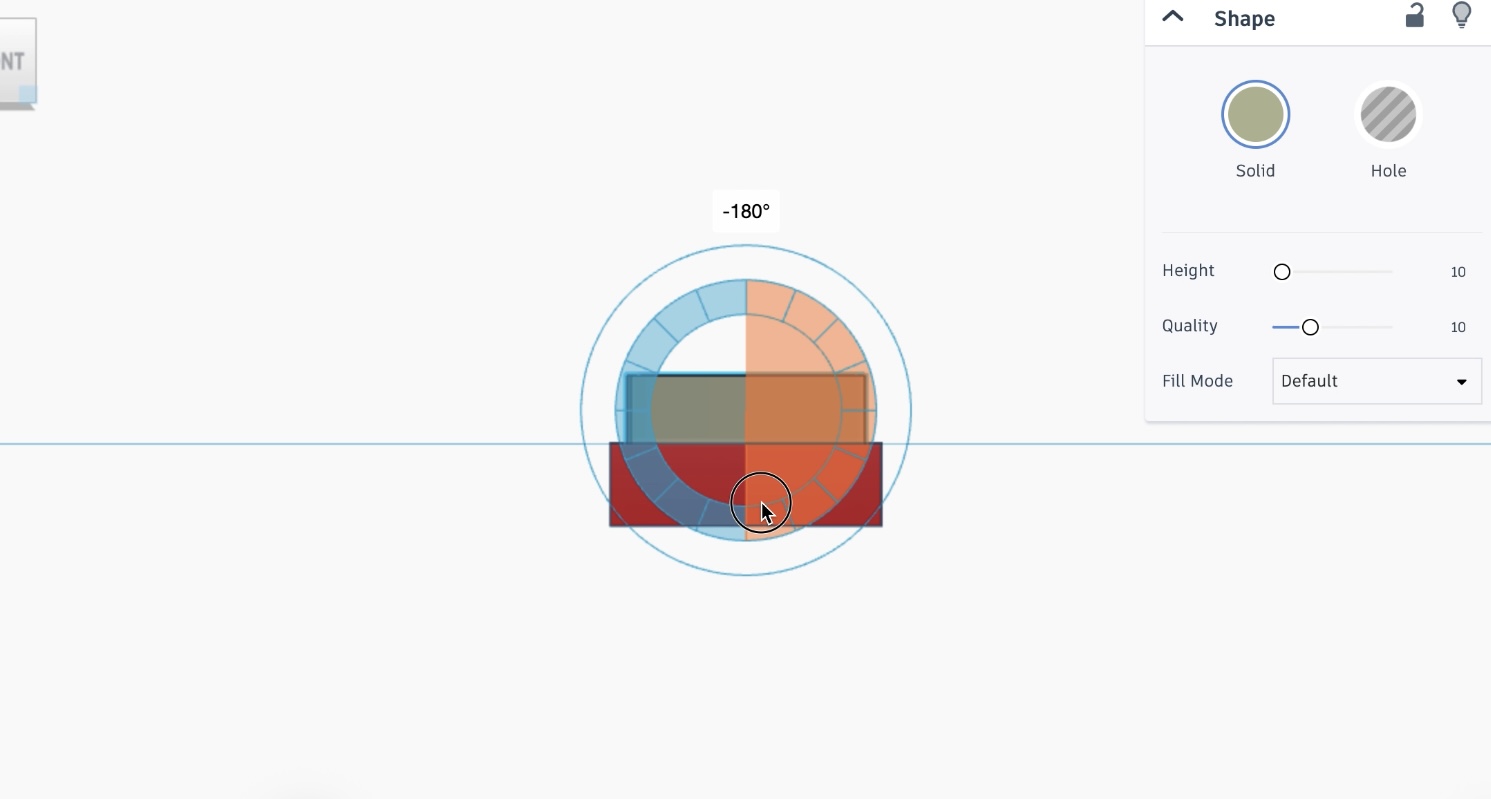
And now, the most important part of the process is to rotate your logo 180 degrees so that when it is pressed into the clay, your logo will show up the right way. Don’t ask me why I’m emphasizing this, I definitely did not make this mistake the first time…
Export your design to a STL file, and that’s it for the CAD part! You can also create a handle here for a better grip, but I personally don’t think it’s necessary. Plus, it will increase the print time and you might need to add support for the overhangs.
4. 3D printing
Finally, it is time to send your design to a printer. Slice your STL file using a slicer software (I use Ultimaker Cura) for whichever machine you are using into GCODE and send it to your printer. I had access to my own, but if you do not, you can also see if there are any 3D printing services or makers labs in your area that can do it for you.
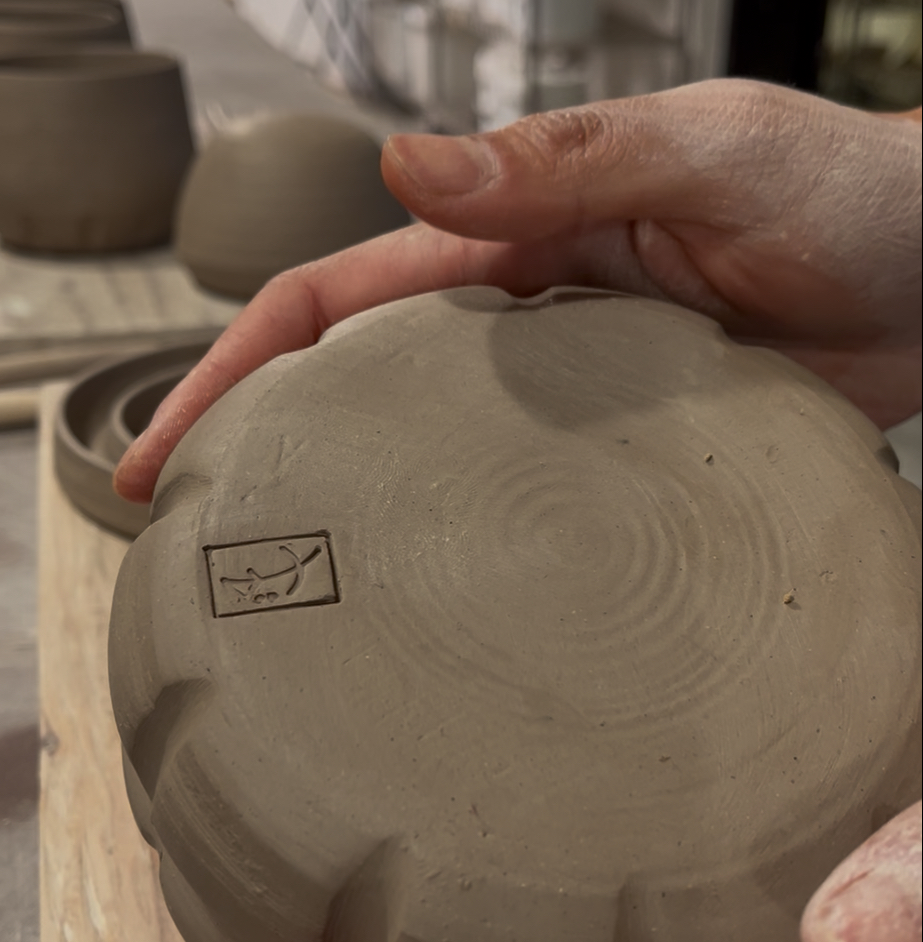
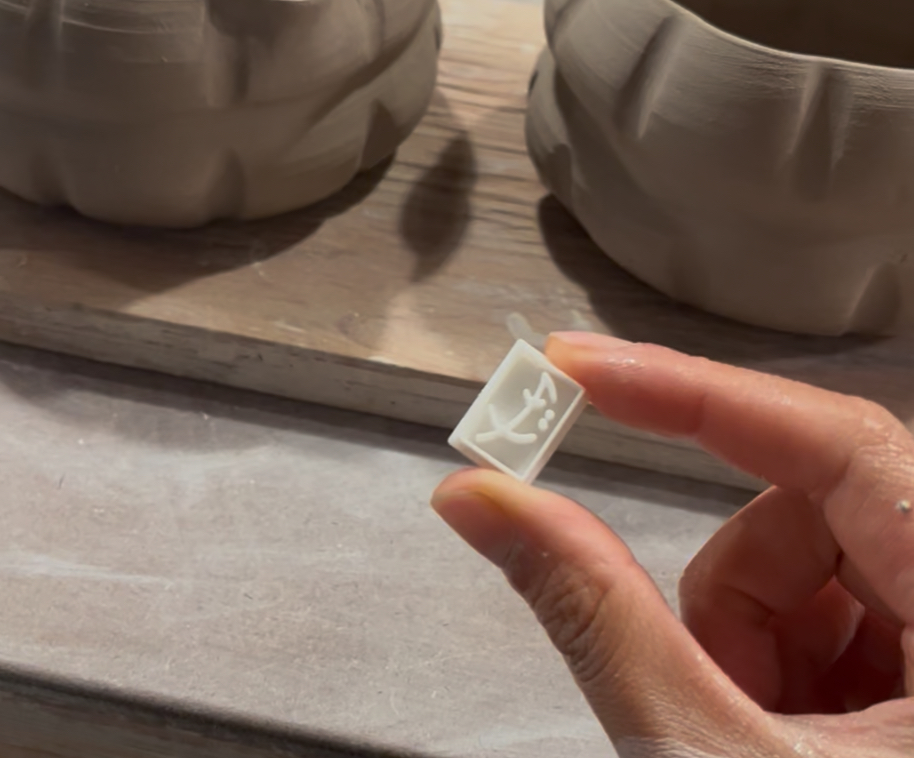
And that’s it! Here’s my new maker’s mark and how it looks stamped into the clay:
Additional Ideas
Of course, there are plenty of ways of remixing this idea. Some methods I think would be fun to explore are:
- Creating multiple SVGs and combining them so that some parts of the stamp have different depths (i.e. the outline is 2.5mm while the middle logo part is 1mm to create deeper grooves in the outline).
- Instead of having the logo part be protroding, in Tinkercad, you can have your design as a ‘hole’ into the base. Obviously, the base would need to be thicker and the logo part would have to be drawn with thicker strokes.
I would love to see your creations if you end up making it! Please tag me on IG (@jmks.goods) :)